There are no strict rules on what your watermark should look like.
If all you need is to highlight the status of your files and send them to the people you trust, you can insert one of the most common textual watermarks, such as “DRAFT”, “CONFIDENTIAL”, „ORIGINAL”, “URGENT” , etc. Word Office can be a great help with this, because it has ready-made templates for this kind of watermarks.
If your priority is to protect the document’s content from copying, you should consider converting your file to PDF first and then adding a watermark with the help of third-party tools. It is better to use an image rather than text, as it will be able to cover most parts of the page and provide better security.
You can add a logo, an icon, your contact details or some multiline text. Feel free to design your watermark in any way you like. Adjust its size, change its placement and customize its appearance. It is not necessary to make your watermark semi-transparent or place it behind the body text. You can insert a watermark at the bottom of the page or add it only on even-numbered pages. You can design your watermark in Word, but frankly speaking, using free watermarking services can be much more convenient as they will give you more room for creativity.
Are you wondering how to add a watermark in Word? It is truly super easy. There is one drawback though. Every person who will get their hands on your document with a watermark will be able to remove it. So it is probably better to save your files in PDF before sending them to other people.
How to Insert a Watermark in Word in a Few Steps
Once you open your document in Word, go to “Design” and click on it. The drop-down menu with options will appear.

Click on “Watermark” in the top right corner.

There is a Windows hotkey combination that allows you to open the watermarking panel quickly. Press Alt>G>P>W.
Choose one of the 12 ready-made templates.
The library offers the following types of watermarks: “CONFIDENTIAL”, “DO NOT COPY”, “DRAFT”, “URGENT”, “ASAP”, “SAMPLE”.

All of them are light gray and semi-opaque. The watermark is always placed behind the body text – it’ll be easier to read the text this way.
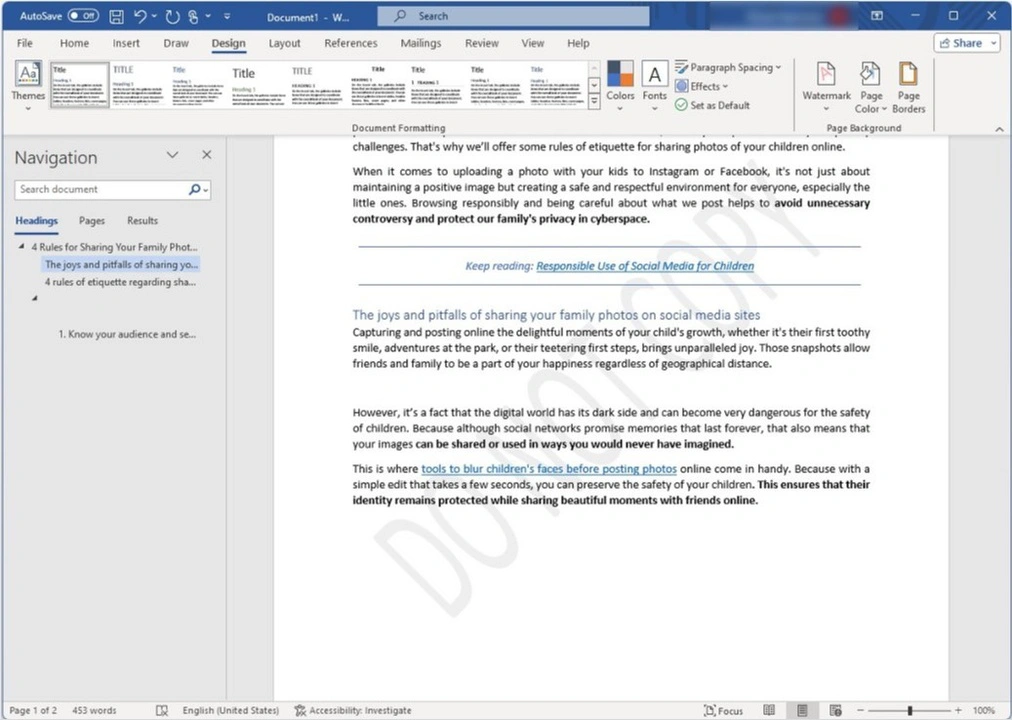
Once you’ve added one of the watermark templates, you will be able to adjust its size, position and the angle of rotation. Note that the color and the level opacity are unchangeable.
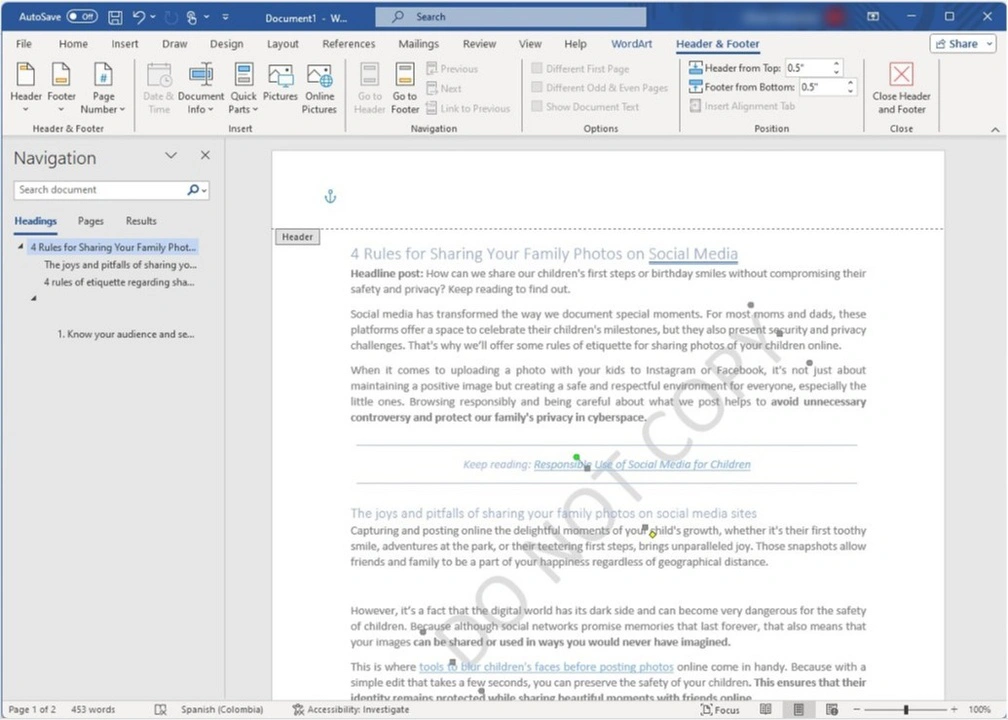
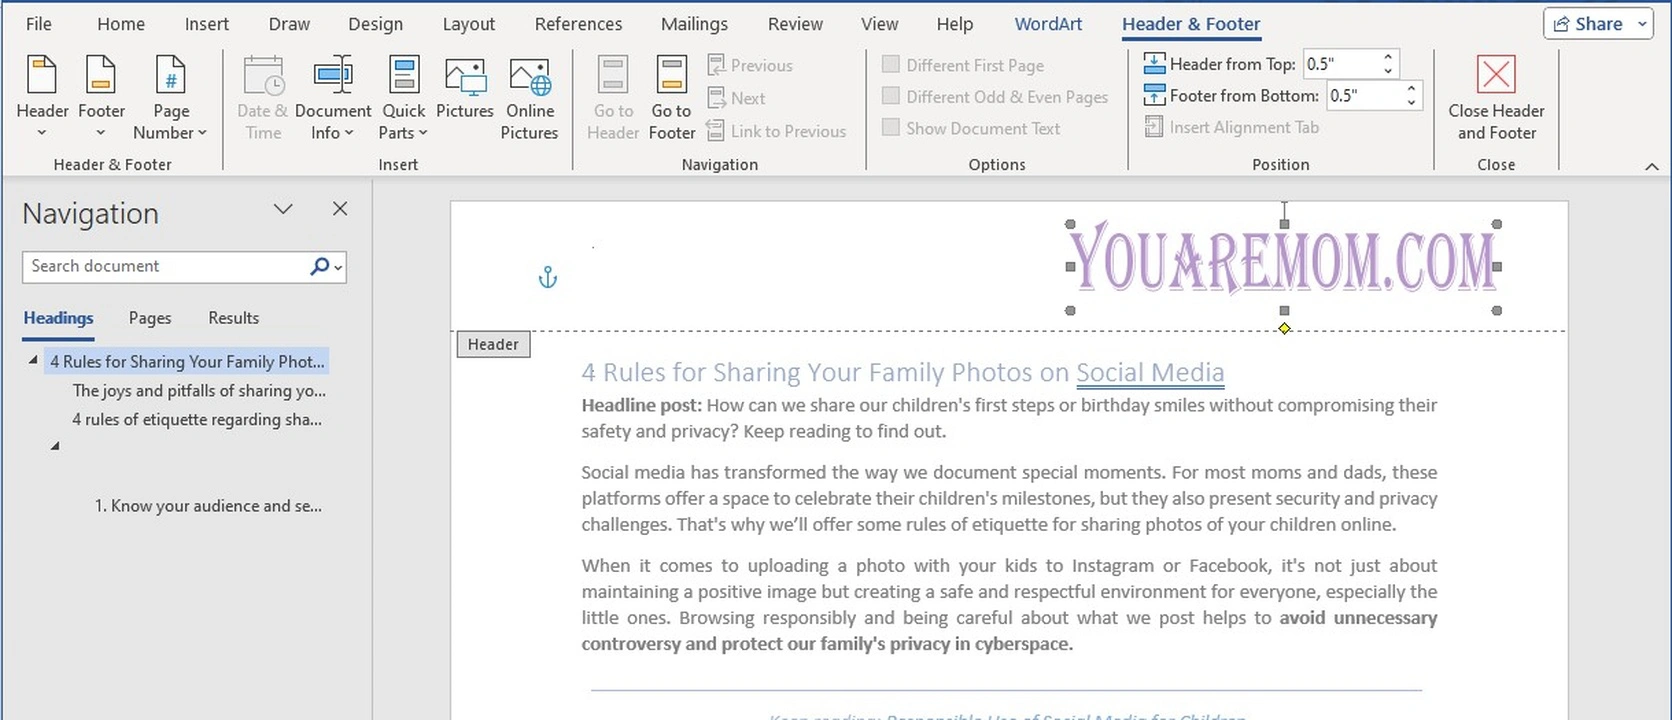
To customize the watermark, enable the Header edit panel by double clicking at the top of the page. Then scroll down to the watermark and click on it. Now you can move, resize and rotate it.
You can remove your watermark at any time by clicking “Remove watermark” at the bottom of the Watermark panel.
Create a brand new watermark by clicking on “Custom watermark” at the bottom of the drop-down Watermark menu.

In Word you can experiment with different types of watermarks. You can add not only textual watermarks, but a picture, too.
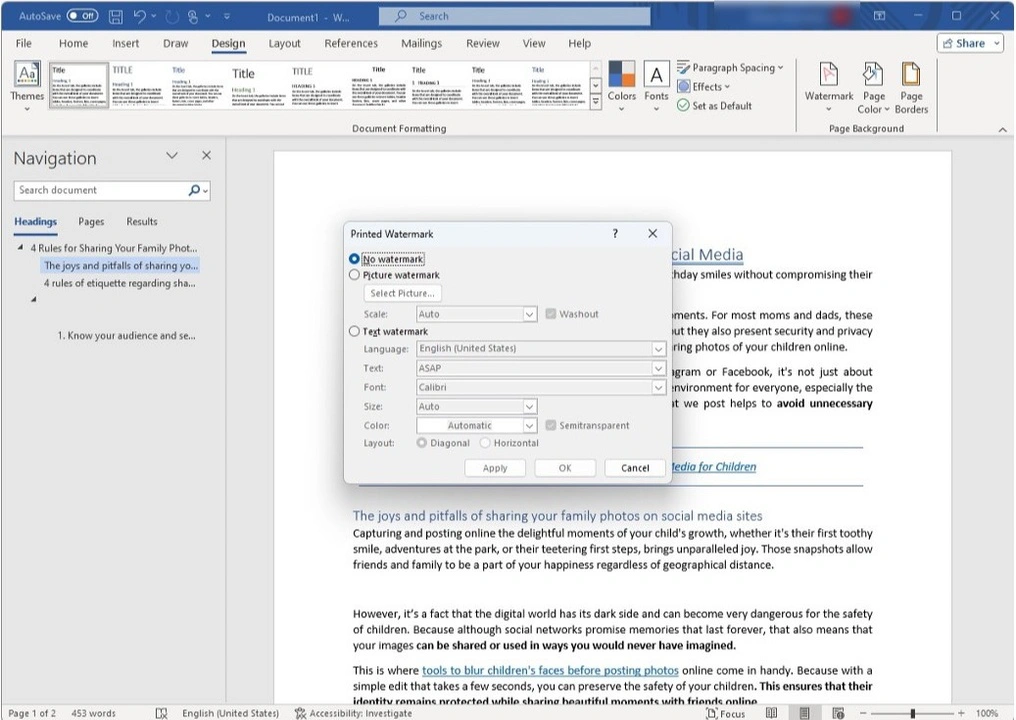
How to add a picture watermark in Word
- Pick the “Picture watermark” and click on the “Select picture” button
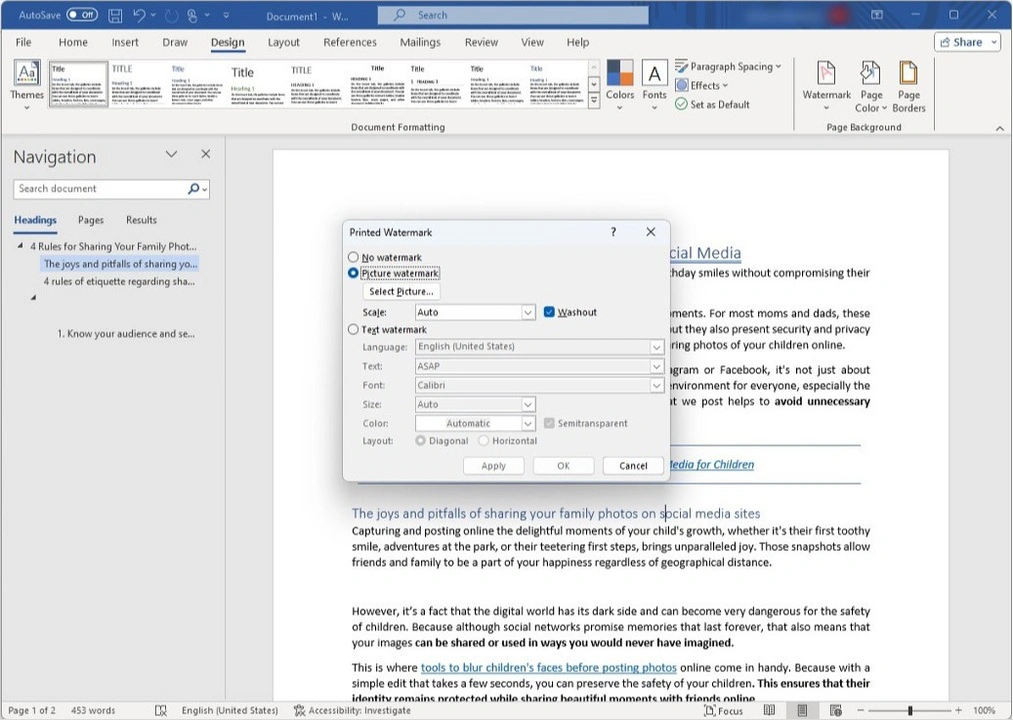
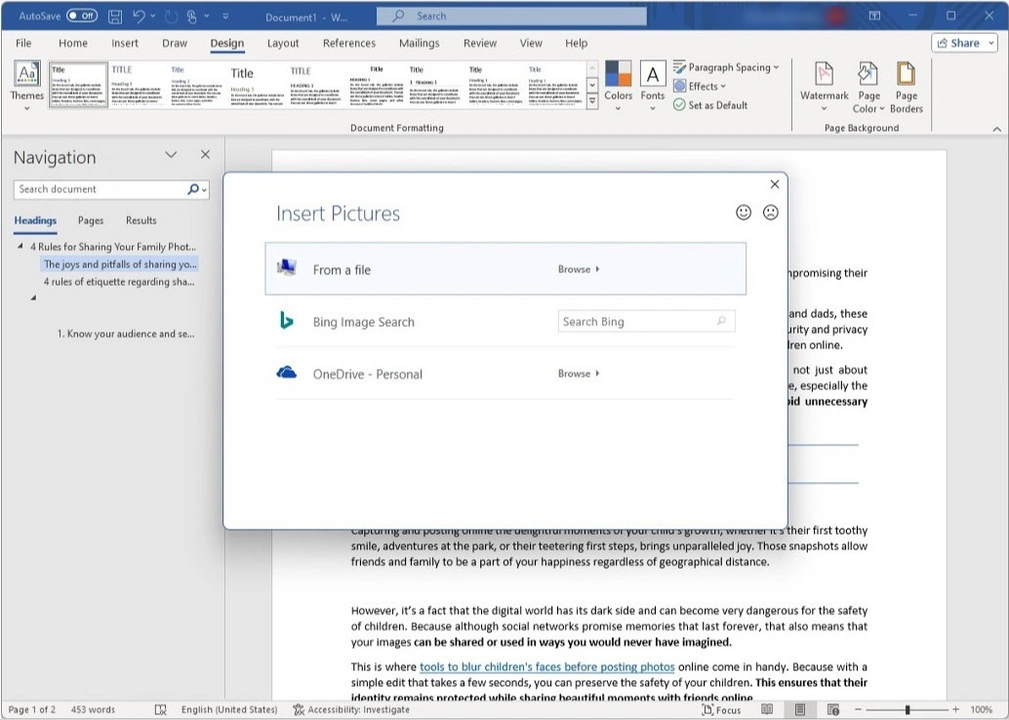
- Choose the source you want to upload your image from
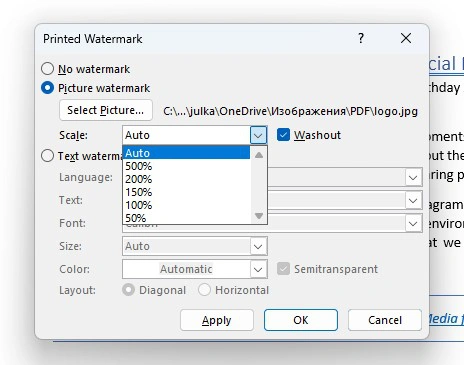
- Adjust the scale.
- Check the “Washout” option if you want your image to be semitransparent.
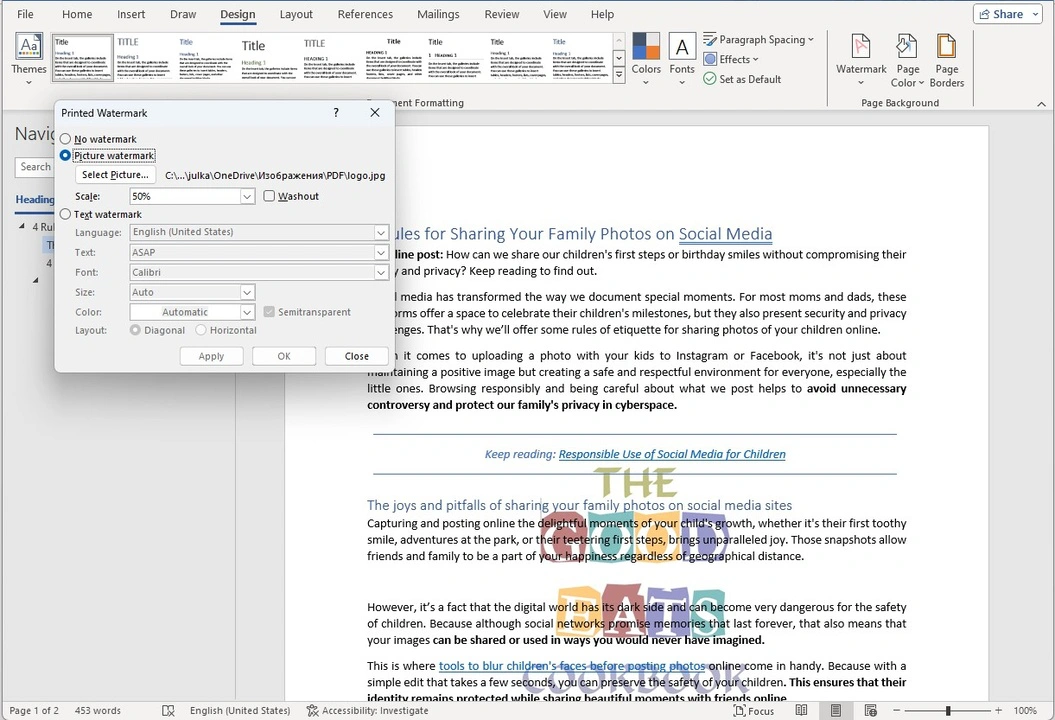
- Click the “Apply” button to preview the watermark.
- Click “OK” when you are done with editing.
That’s all.
Remember, if you need to change the size, position or orientation, enable the Header edit panel of the document, like it’s shown above, and get to tweaking.
Thanks to the option of adding an image, you can easily add a company logo to your file. What’s important is that Word automatically removes the logo background when it’s necessary.
How to add a textual watermark in Word
- Select the “Text watermark” option.
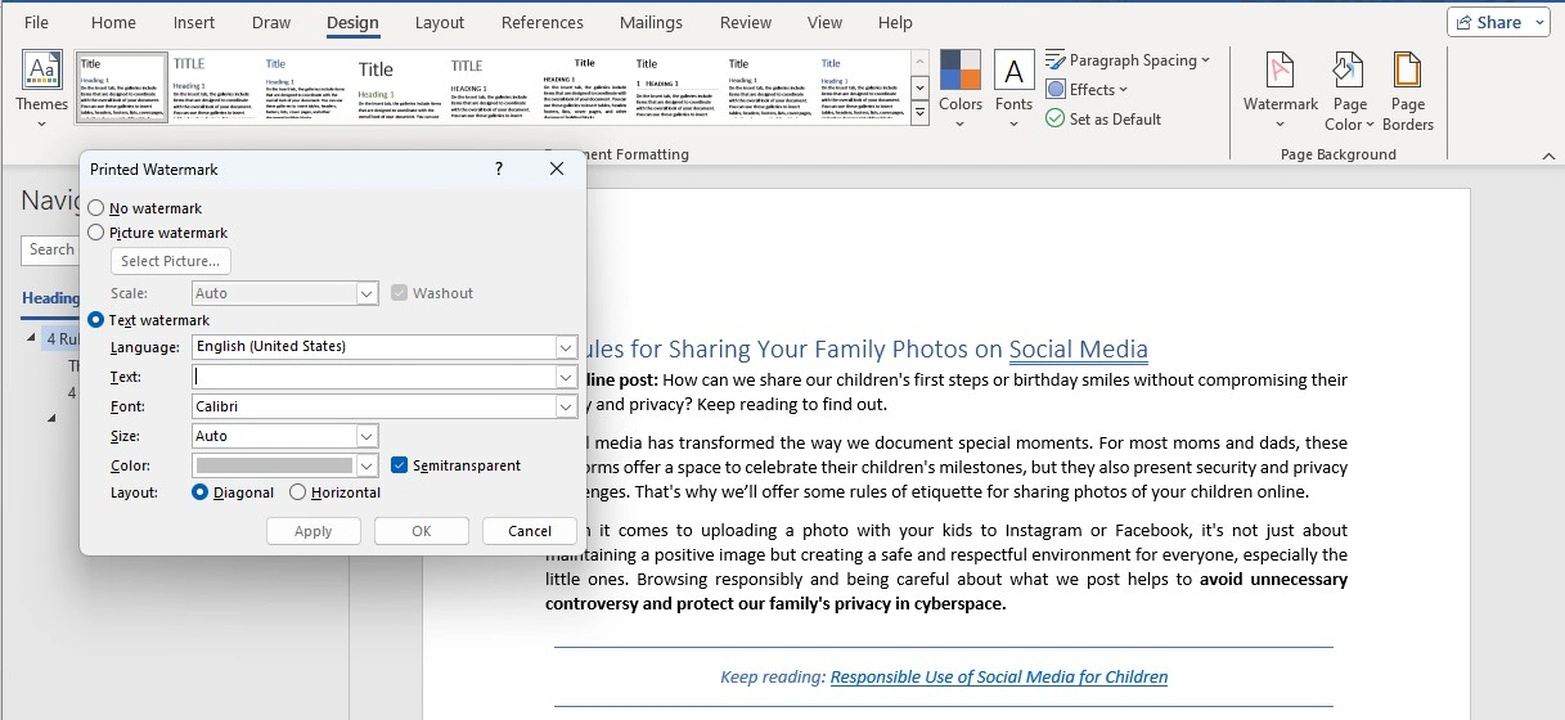
- Make sure that the necessary language is set.
- Type in your text
- Pick the font, the color, the size and the orientation.
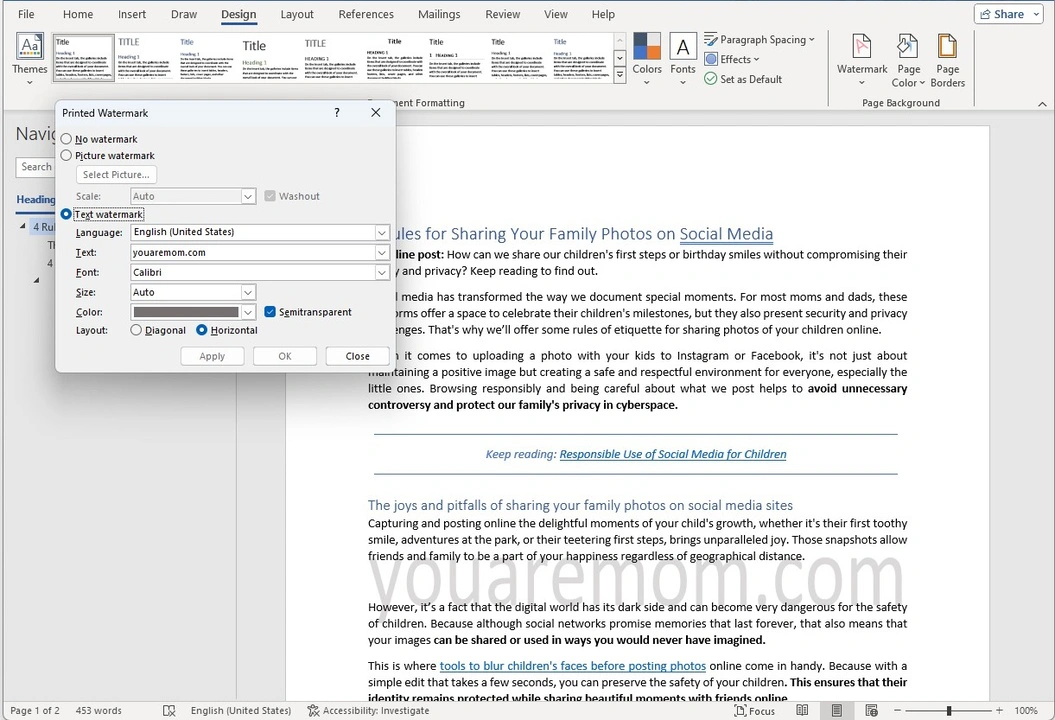
- If you want to preview the watermark while editing, hit the “Apply” button.
- Click “OK” once you are done.
Remember, you can make your watermark more noticeable if you place it somewhere above or under the content.
Go to File > Save to save the changes.
What’s Great About Adding a Watermark in Word
First of all it is very simple. You can insert a desirable watermark into your file while you are editing your text. No fees or no downloads are required. All the necessary editing tools are at your disposal in one and the same place.
Moreover, ready-made templates can significantly speed up the process of designing a watermark.
Thanks to the Preview feature, you will be able to see how your watermark looks on your document and tweak it further if necessary. This way, you will be able to achieve the results you need.
The Main Disadvantages of Adding a Watermark in Word
Frankly speaking, adding a watermark to a Word document does not guarantee its protection at all. Unless you change the format from .doc to .pdf. You must ensure that the content of your file is not editable.
Aside from that, it is worth noting that similar third-party apps usually offer more diverse toolkits to design watermarks in any way you want. These apps can really help you protect your documents from being copied. For example, Visual Watermark has a Tile feature that allows you to cover the entire page of the document with repeated watermarks. What’s more, it’s possible to make your watermark semitransparent and placed behind the text, too.

When you insert a watermark in a Word document, it’ll look the same on all pages. There is a possibility to add your text or image to a specific page using WordArt and Insert Picture tools, but this process is too complicated.
By comparison, in Visual Watermark, you can easily choose which pages to protect – all pages in range, only even, only odd or specific ones – with just one click.
Moreover, in the Preview section, you can adjust your watermark on each page separately. You’ll be able to drag it to a different place, choose a different color, change its size and the level of opacity. On other words, your watermark can look different on every single page!

Watermark in Word can either be semitransparent or opaque. With Visual Watermark you can set the intensity of the color from 1 to 100%.
Why It Is Important to Add a Watermark to Your Documents
Why should you add a watermark to a document? Well, there are several reasons for it:
Protection of intellectual property and copyright
The main purpose of a watermark is to identify the owner of a document. It can prevent theft of your intellectual property by deterring people from copying and distributing your documents without your permission. No one will be able to use your watermarked files for their malicious purposes.
Watermarks have the power to keep your intellectual property safe and away from thieves since it is challenging to leak watermarked documents – everyone will see who the original owner is. Also, depending on your watermark, you might also have the chance to establish who exactly violated your trust.
Designation of status or category of a document
If you watermark a PDF or Word document with such words as “Copy”, “Confidential”, “Sample”, etc, you will visually communicate to people the level of its importance or whether it has a specific purpose or not. This may also help to simplify and better organize the circulation of documents.
Corporate identity
Watermarks can play the same role as artists’ signatures on their paintings. By adding your brand name to your files or adding logo to your photos, you will be able to make your business more recognizable and ensure that current clients and potential new ones won’t forget you. The more people see your name or logo, the more it gets stuck in their minds. So, don’t be shy and watermark as many promotional materials, price-lists, and other documents that you tend to send to your clients as you can.
Authentication
In some cases, a watermark can act as a proof of the document’s authenticity. This is both helpful and crucial when legal and governmental documents are involved. Regardless of whether you want to print out your file or send it via the Internet, it might be wise to watermark it since no one will be able to snatch it without facing the consequences. Yes, this is a format that offers various levels of protection as is, but the documents are still at risk, because thieves can make screenshots and use them to create copies of your confidential information. Watermarks will help you to avoid that.
FAQs
How do I make a watermark appear on all pages in Word?
There’s nothing easier! Open your document in Word Office. Go to Design > Watermark and pick one of the templates or create a new one. In both cases your watermark will be added to all pages automatically.
How to remove watermarks in Word?
Once you open the Watermark menu in Word, find the button “Remove watermark” at the bottom of the panel. Click on it. Your watermark will be removed.
How to add a Draft watermark in Word?
Go to Design > Watermark. Select one of the pre-made “Draft” watermarks. You will find a template with gray diagonal text as well as templates with gray text located horizontally. By default, the watermark will be stretched across the entire page, but you can easily resize it in the Header section of the document.
How to make a watermark more transparent?
All the watermark templates in Word are semitransparent by default. So you don’t need to adjust their opacity. If you want to create a custom watermark, you will need to check “Washout” for a picture watermark and “Semitransparent” for a textual watermark.
Summing Up
Word’s watermarking tool is a perfect solution if you only need to add some standard textual watermarks to your documents, like “Confidential”, “Draft”, “Urgent” etc. Thanks to the built-in templates, you’ll be able to protect your files quickly and with little to no effort. Try to add a watermark in Word if you are striving to communicate certain information to the person who will be reading or editing your text.
If you want your watermark to have a more visually-pleasing design and provide better security at the same time, use third-party apps with a more extensive editing toolkit. With them, designing a watermark can turn into quite a creative and exciting process.
More Watermarking Tutorials
How to Add a Watermark in Lightroom
 Visual Watermark
 by
by 