Adding a watermark to YouTube videos is a rather common practice these days. Fortunately, you don’t necessarily need any special software for this as YouTube Studio actually offers an option to add a watermark to your videos.
What’s a watermark, you may ask? Basically, it’s an image or a brand logo that sits on top of your video. YouTube Studio allows you to position your watermark only in the right corner of the video, but if you use a watermarking app, then you’ll be able to place your watermark practically anywhere you want.
What’s more, your image should meet YouTube’s size requirements. Otherwise, you will experience some difficulties uploading it. An image that you want to use as a watermark should be square and in one of the following formats: PNG, JPEG, BMP, and non-animated GIF. Its image size should be 150 x 150px, while its file size shouldn’t exceed 1MB.
There’s a number of reasons why you might need to watermark your YouTube videos. For instance, a watermark can promote your brand or prompt people to subscribe to your channel. In fact, these are the two most common reasons – content creators tend to watermark their YouTube videos either with a brand logo or an image that says “Subscribe”.

What you need to know about YouTube Studio is that you won’t be able to create your watermark from scratch there. You’ll need to design it in an online photo editor or image editing software, save it as a file, then upload it to YouTube.
Luckily, YouTube Studio allows you to choose when exactly your watermark should appear during your video. It can be shown throughout the entire video, only at the end of the video, or you can set a specific start time. For instance, your watermark can start showing at 1:00 timestamp.
Please note that if you add a watermark in YouTube Studio, it will be applied to all videos on your channel.
Why You Should Consider Watermarking Your YouTube Videos
There are several reasons for adding a watermark to a YouTube video:
- Boosting brand recognition. Ideally, your brand should be the first one to come to your potential customers’ minds when they face a problem that you can solve. And it’s a rather well-known fact that the more people see your brand logo, the better they will remember it. Therefore, they will be more likely to reach out to you when a need arises. This is one of the reasons why content creators tend to add a logo to photos that they publish on social networks. The same strategy will work well with video content, too. You can use your brand logo as a watermark and add it to your YouTube videos. It’s a simple, yet effective way to promote your brand and achieve top-of-mind awareness.
- Encouraging people to subscribe. The main goal for any content creator is to have as many subscribers as possible. Watermarking YouTube videos can be of a great help with that. But instead of a logo, you’ll need to add an image that says “Subscribe” or “Follow”. This will remind people with subtle persistency that if they like the content they are watching, they should subscribe. Also, people love when things are easy. And your clickable watermark will make it super-easy for them to subscribe – they will simply need to click on it!
Watermarking YouTube videos is not only a great and effective way to strengthen your brand identity, but also a strategic tool to boost engagement and subscriber growth. This is how content creators can surely improve their presence on the platform as well as build a loyal and active audience.
How to Add a Watermark to Your YouTube Videos
As noted above, you can’t create a watermark from scratch in YouTube Studio. It’s only possible to upload an already existing one. Once you have your logo or image ready, you need to do the following:
- Sign in to your YouTube account.
- Go to YouTube Studio.
- In the left-hand menu, click on Customization, then go to the Branding tab.
- Scroll down to the section titled “Video Watermark”.
- Click Upload and select the necessary image.
- Choose the display time of your watermark. In other words, when exactly during the video your watermark will appear and for how long. Here are the options:
- End of Video: Your watermark will be shown for the last 15 seconds of the video.
- Custom Start Time: You can choose a specific time in the video when your watermark should start showing.
- Entire Video: Your watermark will be displayed throughout the entire video.
- Click Save.
Once you add a watermark in YouTube Studio, it will automatically appear on all your uploaded videos. The display time of your choice will be the same for all the videos.
Key Tips for Using Watermarks on YouTube Videos
1. Your Watermark Should Be Noticeable
Remember, a watermark on a YouTube video should be around 150 x 150 pixels; if you add it in YouTube Studio, that is. It’s a pretty small image size, but there’s a reason for it. Depending on its color and design, a watermark can be quite distracting. By making a watermark this small, YouTube makes sure that it will be unobtrusive, and all the attention of viewers will be on the video.
Nevertheless, your watermark should be noticeable for you to make the most out of it. It’s a good idea to experiment with various designs and color schemes. By utilizing bright, attention-grabbing colors, you can make your watermark more eye-catching and hard to overlook. Your logo might have a transparent background to fit into the video more organically, but a solid background will surely make it more noticeable and intelligible.
Below are two examples of watermarks.
Here’s an example of a watermark on a YouTube video with transparent background.
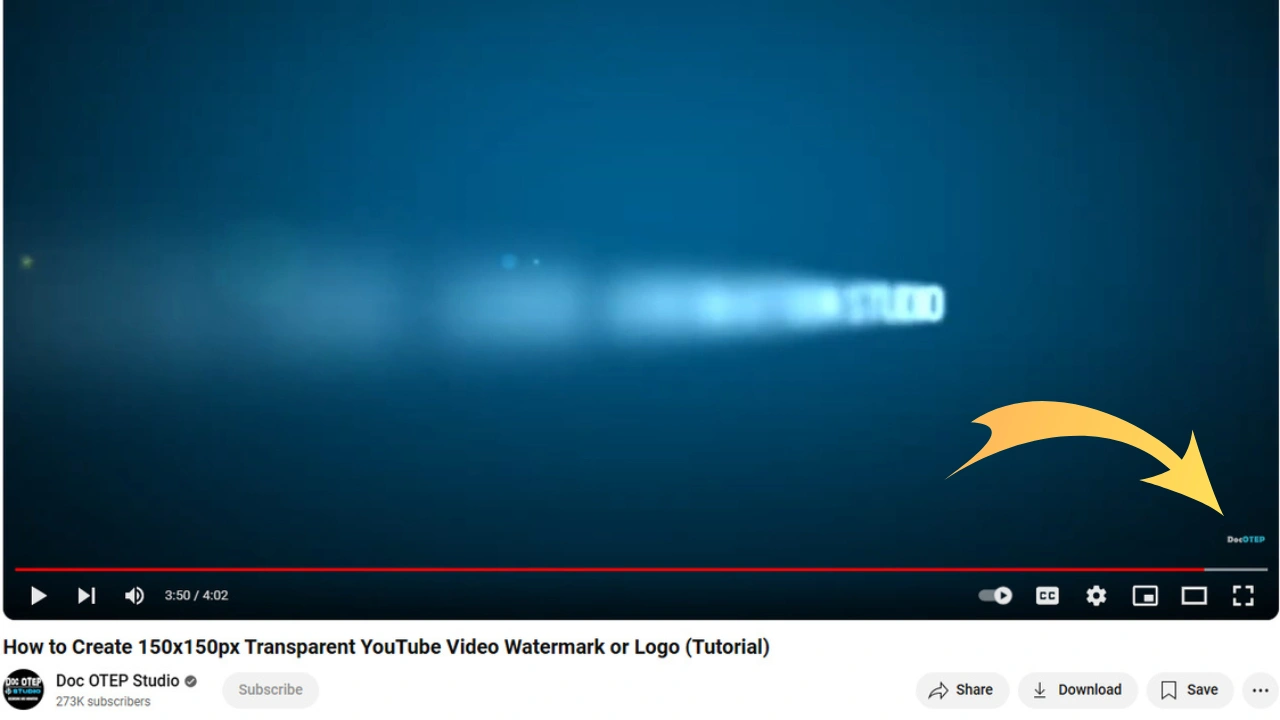
A watermark on a YouTube video with solid background.

As you can see, the background makes quite a significant difference. It’s challenging to see the brand name clearly in the watermark with transparent background. Not to mention that the watermark itself is barely noticeable. So, no one will click on it. No one will remember the name of the brand. A watermark with solid background, on the other hand, is perfectly readable and visible. Thanks to its blue color, it immediately catches the eye. So, people will be more likely to do exactly what this watermark says.
It’s important to note, however, that there is no one-size-fits-all rule. The best strategy here would be to experiment and give a try to both types of watermarks. To put it simply, add a watermark with transparent background to your videos and wait for a month or two. Then do the same with a watermark with solid background. Finally, based on analytics, determine which one brings in more subscribers and gives better results.
2. Choose the Right Type of Watermark
In most cases, content creators watermark their YouTube videos with a brand logo.
It can be specifically designed to promote their YouTube channel. Alternatively, it can be a logo that’s added to their content across all social media platforms to promote their brand. What is the main advantage of this type of watermark? It looks professional and builds trust. Plus, it can help with increasing brand-awareness since people will remember your logo better. There’s a drawback, though. Some viewers will be unaware that the watermark is clickable and that they can easily subscribe by clicking on it. Thus, this type of watermark should be chosen if promoting your brand is your top-priority.
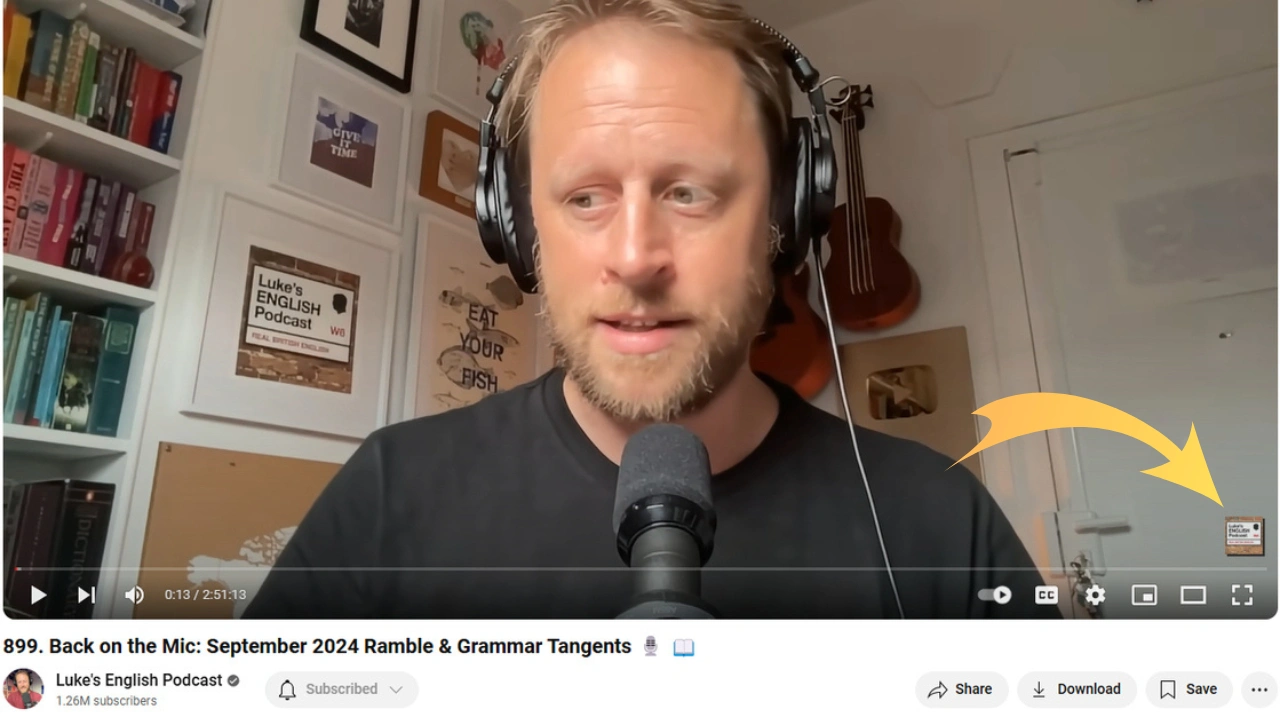
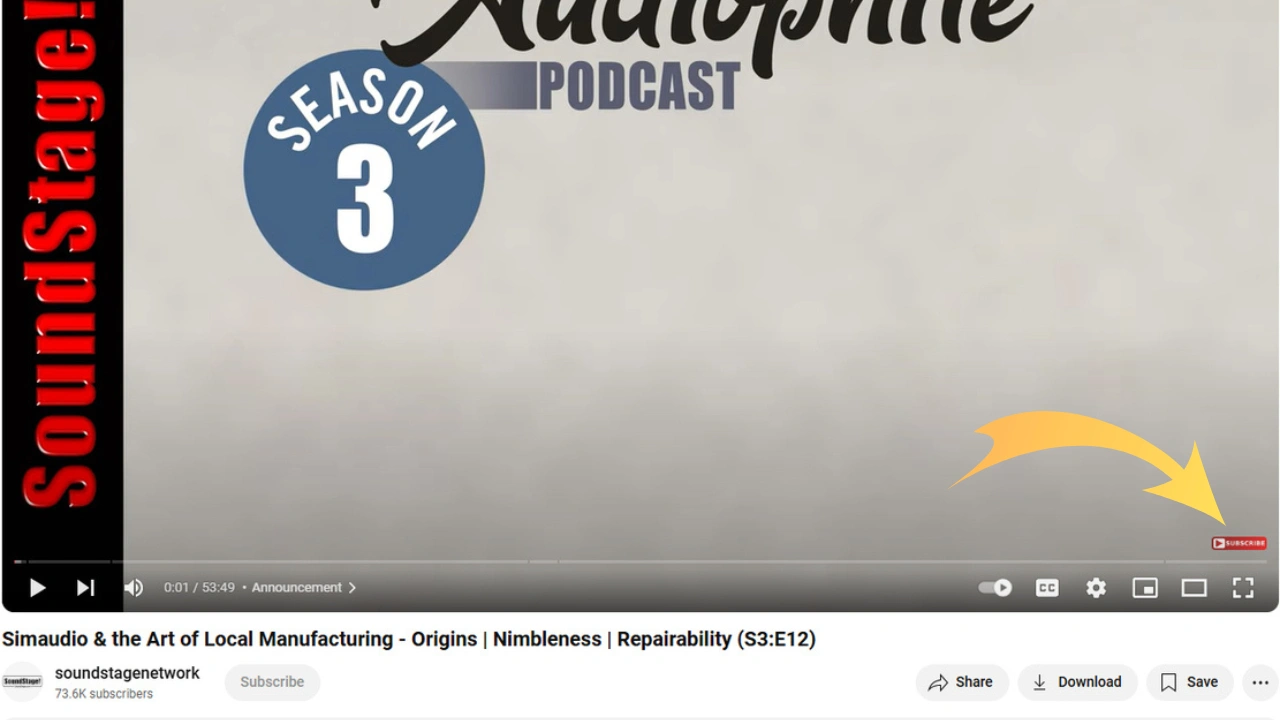
Another common type of watermark is the image that says “Subscribe”.
It’s possible to experiment with different colors, fonts and overall design here. Yet it’s not uncommon for people to add a watermark that looks like a YouTube subscribe button. As you can guess, viewers will understand exactly what this red button is for; even though they won’t realize that it’s actually a watermark. This type of watermark won’t be useful for raising brand awareness, but it will surely help you with growing your YouTube channel. Backlinko actually did an experiment. They replaced a brand logo with a red YouTube button, which led to a 70% increase in the number of subscribers.
The third type of watermark can be used to promote your website or account on a different social media platform.
For instance, you can add an image with the Instagram logo and your nickname to encourage people to follow your Instagram account. Nowadays, most people tend to promote their services or products on more than one platform, and this type of watermark is an efficient and effective way to cross-promote your social media channels.

3. Choose the Right Display Time of Your Watermark
Both the design and the time when your watermark appears during a video are important. Unfortunately, if you add a watermark in YouTube Studio, it will be applied to all the videos on your channel. You won’t be able to set different options for different videos. Therefore, you’ll need to determine what the optimal option for the display time of your watermark is.
Typically, YouTube content creators go for one of these strategies: a watermark is shown either from the very beginning (at 0:00) or after the intro (00:30-1:00).
It’s better to choose the display time from the very beginning, if you are using your brand logo as a watermark. This display time is extremely useful for brand reinforcement. People will see your brand logo right away and for a longer period of time. However, the downside of this approach is that your watermark can be distracting to some viewers during the first 15 seconds of the video which are crucial.
If you opt for the second strategy and set your watermark to appear a bit later, your viewers won’t get distracted from the intro. However, in this case, your watermark can be even more distracting. Because it will be introduced as a new visual element that suddenly shows up on a video after the intro.
Consider pros and cons of both options, then decide which one you’ll go for. Alternatively, you can experiment with all the options that YouTube Studio offers and see which one works best for you.
When You Should Use Software for Watermarking Your YouTube Videos
Adding a watermark in YouTube Studio is simple and easy. You can use this tool to promote and grow your channel. But without a doubt, you won’t have much flexibility or control over the design or placement of a watermark here.
What’s more, if you watermark YouTube videos this way, there will be no protection against unauthorized use since your watermark won’t be a part of an actual video file. If someone downloads your video from YouTube – there are ways to do this – and reuploads it elsewhere, your watermark will be gone.
What if you need more tools and features for editing a watermark? What if your primary goal is to make it harder for others to steal and pass off your content as their own? Well, it might be a good idea to watermark videos with an app developed specifically for this purpose. For instance, Visual Watermark.
Here are the key advantages of Visual Watermark compared with watermarking videos in YouTube Studio:
- Enjoy creative freedom. Here, you’ll be able to create a textual watermark from scratch or upload your own logo file and make some minor changes to it. There’s a broad set of tools and features for editing watermarks that allows you to choose a color and a font, add an effect, and adjust the level of opacity. It’s possible to place your watermark anywhere within the frame you want – in the top left corner or in the center, for instance.
- Set any size you want. There are no size requirements to meet. You can upload image of any size you want. What’s more, you’ll be able to change the size of your watermark right in the app. You can make it big or small. Your watermark can take up 50% or only 5% of the frame – it’s entirely up to you.
- Add multiple watermarks. Here, you will be able to add more than one watermark and even add multiple watermarks to different parts of a video.
- Choose the display time for each video. Visual Watermark is a batch-watermarking app, so you can process a batch of videos in one go. In this case, you will choose the display time for all the videos in the batch. However, it’s also possible to process only one video at a time and set a specific display time for your watermark in this video. If you add multiple watermarks to a video, you can set different display times for each watermark. For instance, you can add a brand logo and a Subscribe image. Your brand logo can be shown throughout the entire video, while the Subscribe image will appear only during the first 15 seconds.
- Protect against unauthorized use. Your watermark will be embedded into the video file. In other words, it will be a part of your video. This way, even if someone downloads your video from YouTube, your watermark won’t be gone. So, thieves won’t be able to pass off your video as their own. If thieves are dumb enough to reupload your video without removing your watermark, they will essentially promote your channel for free.
- Post on various platforms. You can add a watermark in YouTube Studio, but not all social media platforms offer this feature. For instance, you can’t watermark a video in Instagram’s editor. You’ll need to use some other app for this. So, you can use Visual Watermark to watermark all the video content that you post on different social media platforms.
There’s a downside that you should be aware of, though. You won’t be able to add a clickable watermark in Visual Watermark. So, even if you add a Subscribe image, nothing will happen when people click on it.
Conclusion
Adding a watermark to your YouTube videos is extremely useful. It can help you boost the engagement, build a loyal audience across various platforms, improve your brand recognition and protect against unauthorized use. By choosing the right type and the best display time, you can make your watermark more effective. You can watermark videos in YouTube Studio – it’s pretty quick and uncomplicated.
However, you’ll still need to create your watermark elsewhere. Using a watermarking app might be a better option as it will offer an option for creating a watermark from scratch. Not to mention that you will have much more flexibility and creative freedom. Whether you should watermark videos in YouTube Studio or a watermarking app depends on your needs and goals. Give each option a try and see which one is more suitable for you.
 Visual Watermark

 by
by 