Do you need to blur a part of an image? Look no further – this might be the perfect choice for you! In our free, online app you can blur anything you want.
Add images to the app
No matter where your files are stored - on your device, in a cloud storage, or on a website - you can upload them into the app effortlessly with just one click.
Our app processes everything instantly in your browser, ensuring 100% privacy of your data. None of your files will be stored on our servers.
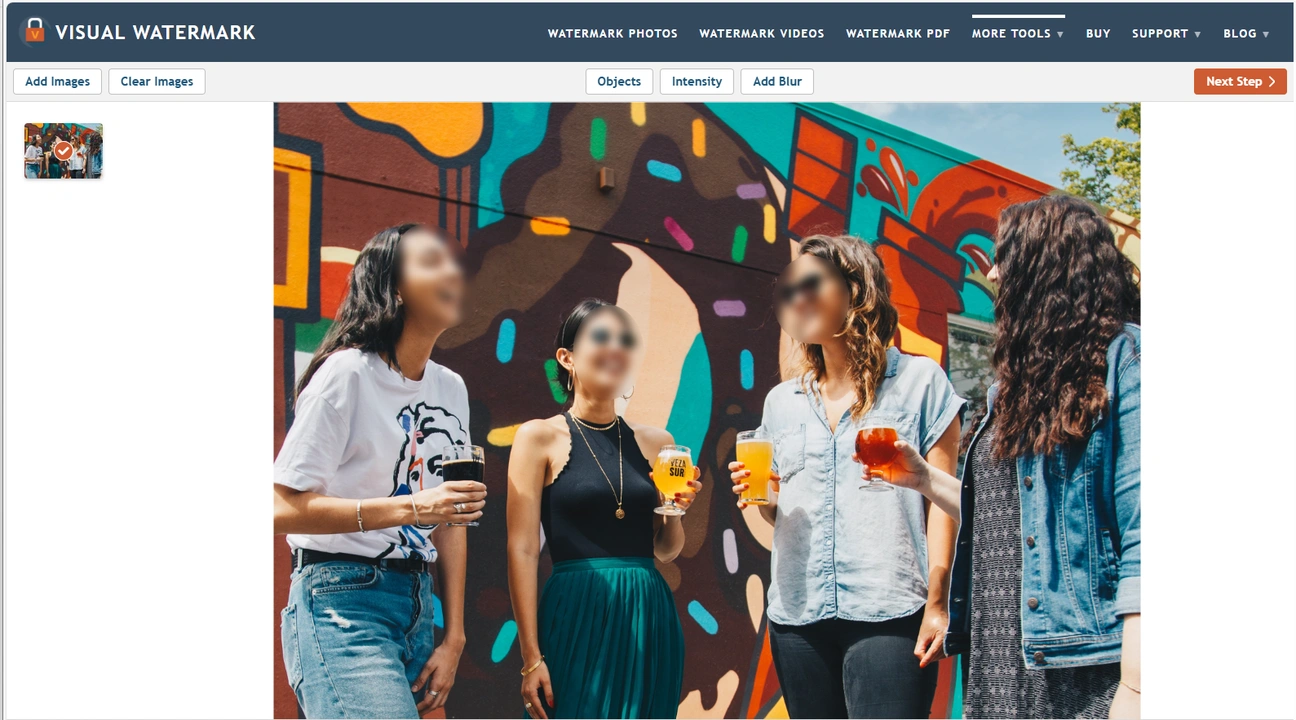
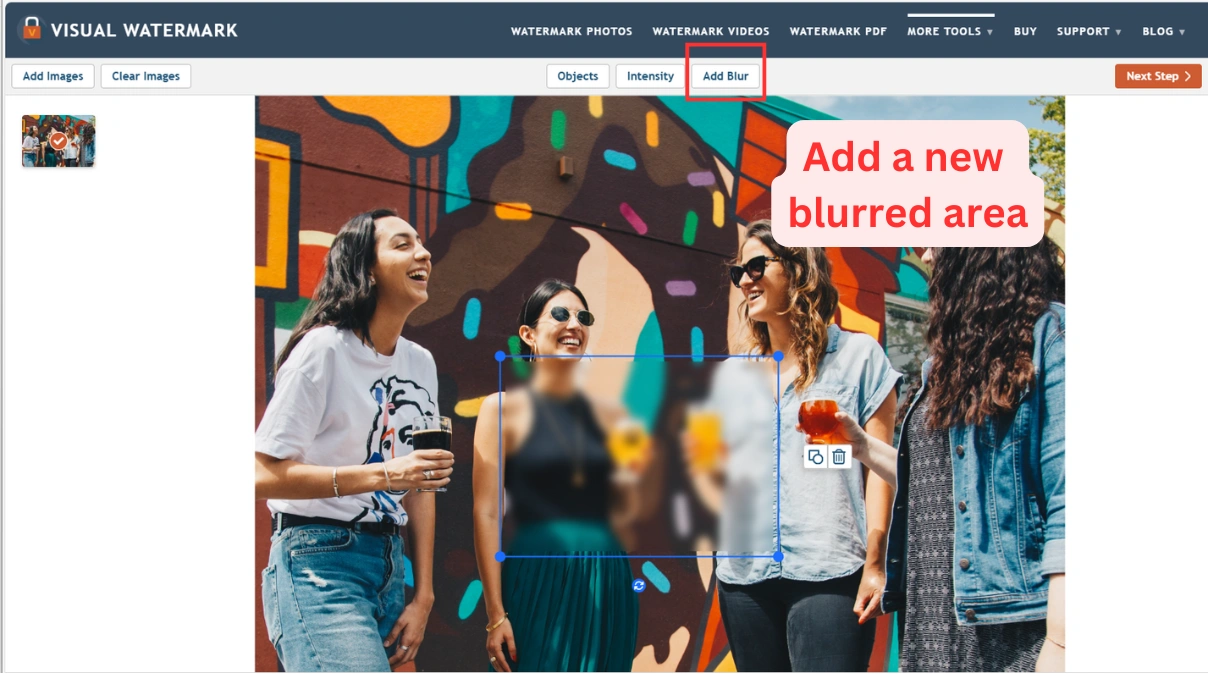
Blur part of an image
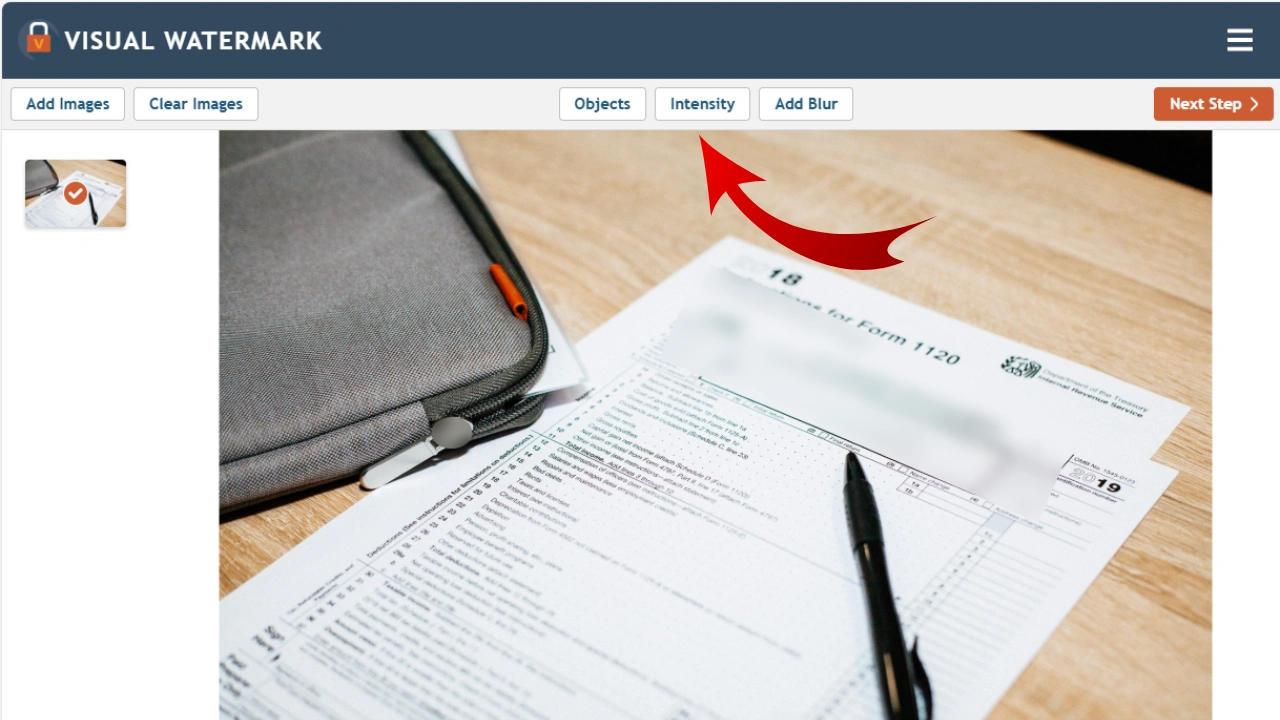
The app offers a clean and straightforward interface as well as a toolkit that consists of only the essential tools for blurring. You can customize the shape of the blur area, and make it more or less intense. You’ll be able to achieve the desired result easily, even if the object you need to blur is tilted or small in size.

Export modified images
We strive to make your experience as smooth and efficient as possible. That’s why, in the export settings, you can resize images, choose a different file format, rename files, and preserve metadata if needed. Finally, go to Blur Images > Download. The results will be saved to your device or exported directly to your cloud storage.
Blur part of an image online on Windows, Linux, macOS, or give a try to our mobile app on iPhone.
There’s no need to worry about the safety of your files - no changes will be made to them. Our tool never overwrites the originals; it automatically creates copies and applies the blur to those instead.
Fast & Easy Seamless User-friendly
Save Your Time and Speed Up Your Workflow With Our App
Our app makes blurring incredibly easy and quick! It is ideal for anyone who needs instant results without compromising image quality. In most cases, all you have to do is upload your images and download them just a few seconds later. The bulk of the work is done for you. Even if manual adjustments are needed, they’ll only take a moment.
Here’s why you can significantly speed up photo processing when blurring something in a picture:

The most user friendly website I have used!!! They literally couldn't make it easier to get the job done. THANK YOU designers!!!!!
Joanie, United States
Blur Part of an Image Without Ruining Its Aesthetic
There’s no brush tool. In our app, the blur area is in the shape of a rectangle or a circle and has clearly defined edges. This method of blurring part of an image is simpler and, more importantly, looks cleaner. What’s more, after downloading the processed images, the blur edges become softer. So, the blur area fits in more naturally.
To make your blur almost unnoticeable, you can:
Blurring part of an image while preserving its overall aesthetic is perfect for commercial photos, such as those used on car sales or real estate platforms. All private information will be securely hidden, while the viewer’s attention stays focused on the main subject - not the blur.

Great site! Free as well, works wonders, plus the privacy features make me feel a bit more comfortable with editing my files!
Anthony, Cyprus
Blur Images Instantly - No Skills or Sign-Up Needed
The app combines efficiency and simplicity. You will be able to blur an image quickly, even if you’ve never done this before. It’s really easy to understand how everything works. No image editing skills are required.
You can start blurring images right away. Our app is browser-based, which means that you won’t have to spend your time on downloading and installing it.
Additionally, there are no accounts on our website, so you won’t need to sign up or sign in.
Even in the free version nothing will distract you – neither annoying ads nor pop-ups. Just open the app, upload your file, blur all the necessary parts of an image, then download the processed copy.

This is a magnificent application, I have been using it for years and they are always improving and looking for ways to make your work easier. I recommend it to everyone.
Jonathan, United States
Blurring parts of an image serves several important purposes, from protecting privacy to enhancing the visual impact of a photo. Whether you're editing personal snapshots, commercial images, or professional materials, here are the key reasons why blurring is useful:
On our website you can find an online tool for blurring images. It works in a browser, so you can use it to blur images on any device and any operating system. You will be able to use our app no matter where you are as long as you have the Internet connection.
There is a mobile version of our app for iOS. So, if you want to blur a part of an image on iPhone, you’ll need to find “Blur Face On Photo“ app in the AppStore, then download and install it. Our mobile app is free, but you will be able to process only 10 files per day.
You can blur a part of an image in Photoshop in several different ways. First of all, there’s the Blur Tool. You simply select this tool and paint over the area that you want to blur. You can also use the Marquee Tool to create a selection, then make the selected area blurry. Finally, you can blur an image with the help of the Layer Mask and the Brush Tool. All the details are in our blog post here.